Friday, October 01, 2010

Antiquing wood

The art of antiquing wood is done by steel brushes, where you remove the soft wood from the wood and leave the hard wood intact. The soft wood are the summer wood and the hard wood is the winter wood. Picture a tree going faster in the summer time making the grain structure softer and slower in the winter time making it harder.
Here are the product for doing it with hand tools. All products are available at http://flap-wheels.com

Antiquing wood steel brush head

This product is sold in our web store and it attaches to a 1/2″ drill chuck so you can run it in a drill. We also offer air tools in our web shop for doing this work but sometimes a small head to attach to your own drill makes the work easier when its just a small job that needs to be done.

Antiquing wood look

Antiquing wood
As can be seen in this small sample what the steel brushes do are making linear lines in the wood to make the wood look old. The longer the tool is used over the wood the deeper the groves in the wood will get. After using the steel brushes a clean up process with flap wheel abrasives brushes are recommended.

Clean up Antiquing wood

The same head that you are using the steel brushes on can take an attachment for clean up brushes as seen in this picture.
The flap wheels with brushes and abrasives in a p150 will do a good job getting the wood smooth again after the Antiquing wood process and the wood part is now ready for stain color or sealer.
Here is a video of the whole process using a QuickWood air tool with the same steel brushes.
If you are in the market for Antiquing wood in small scale or bigger scale you have come to the right place


Saturday, August 21, 2010

IWF 2010 QuickWood News Booth # 6878

IWF 2010 QuickWood News

QuickWood will introduce a true 3 in 1 machine at this years IWF 2010, the machine will have just one spindle over a conveyor belt but the spindle can be change between a drum sander, a brush sander or a rustic sander. Its a true universal machine. The machine will have a 24″ spindle over the conveyor this spindle can change out easy between the 3 different tools. Making it the perfect machine for the small shop that wants to do custom work and a little of everything. The CS1-600 will be offered at a special introductory price of $14,000 and it comes with 1 sanding drum, 1 flap wheel drum and 1 rustic steel drum. This offer is only good at IWF 2010
IWF 2010

We are ready for IWF 2010 in Atlanta what about you ?

We will be bringing our great little molding sander the CD2-300 for sanding 3 sides of a molding in one pass, this sander is normally $17,000 loaded and delivered but we will run a special at the IWF 2010 show only where you can buy the machine for $14,000 loaded with abrasives and brushes and delivered to your shop. If you have not seen the CD2-300 molding sander in action check it out here on this page, or come see us at the IWF 2010 woodworking show in Atlanta
iwf 2010 special deals

Other Machines available from QuickWood at IWF 2010

QuickWood will have some great special prices on a couple of demonstrations machines that we have secured for the show only. We will be offering very special deal on the Elite 1100 Vac (43″ wide) and the Elite 1400 Vac (55″ wide) these machines has seen very little use and are only a few years old. They are all in mint condition and available with a full 1 year warranty from the installation date. These machine will be sold to the first visiting customers looking for these models. Prices will be in the $50,000 – $60,000 range per machine. So please don’t wait to come see us if you are looking for a QuickWood finish sander at IWF 2010
iwf 2010 demo machines


Comes see us at IWF 2010

Tuesday, April 27, 2010

Working with flap-wheels

Imagine you have taken a great deal of time and care to create an intricate profile for a special project. No matter if this profile were created by hand, by manual router, by a CNC style machine or a molder. The next step is going to be how to sand this intricate profile without destroying the detail.
I know of only one method that works well, the
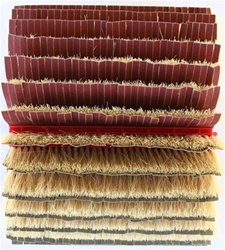
 flap wheel head.

Flap wheel heads are designed to be flexible. This flexibility allows the head to conform to the shape being sanded. When a flap wheel head of the proper configuration is applied to your material multiple things will happen.


In Raw Wood Sanding

First, the process of flap wheel sanding denibbs your product. This is to remove the small fibers that pop up when sanded in any other way or when any type of chemical or water is applied to the surface of the material. These fibers if not removed will raise up and set in a dried position causing a rough primer or stain and seal coat. This will require additional sanding time being needed between coats to achieve a smooth top coat. Utilizing a flap wheel head will remove these fibers resulting in much less sanding time between coats.
In some cases less finish materials will be required because there is less fiber to cover.

Second, you will benefit from the fact that flap wheel heads will insure a uniform pore opening in the material. Uniform pore openings result in uniform color balance throughout the work surface.

Third, you will slightly soften the sharp edges. Softening these edges eliminates the area that is almost impossible for stain, sealer, or paint to find enough mass to adhere. Incorporating a slight radius in these areas eliminates the weak area in a finish. It also makes sealer or primer sanding much easier in that you are less likely to sand through the finish in these areas.

In Sealer or Primer Sanding

First, you will have a more thorough and uniform scuff of the sealer or primer coat. This scuffing will ensure a superior bond between seal or primer coat and the top coat.

Second, if the material was properly sanded in the raw, you should now be able to flap wheel sand the sealer or primer coat without burning through or white lining your product.

Third, a more uniform and overall higher quality of the finish.

Biggest benefit in both raw and sealer or primer sanding? You increase quality while decreasing LABOR!

Setting Up a Flap Wheel Head after the Molder


Sanding your molding with a flap wheel head after the molder will help decrease surface markings and aid in creating a better product. In working with molders it is critical to keep spindle tooling clean, sharp, and well balanced. With this combination and making sure to not over drive feed speeds a decent profile can be produced on most molders. 

The next step is proper sanding of the material after the shapes have been created. I have found only two methods that will work well for sanding profiled material. One is using a shaped wheel that matches the profile of your product. These shaped wheels are similar in nature to a grinding wheel. These shaped wheels can remove a fair amount of material and will help with removing tooling marks but will not denibb your surface nor help with color balance. You will also need a head to match each profile you want to create.
Enter the flap wheel head. Flap wheel heads are designed to be flexible in order to conform themselves to the shape being sanded. This has the unique benefit of very small changes in machine or head settings to accommodate different profiles. 


When sanding molding with a flap wheel head you must understand that only a small amount of material is going to be removed. Sanding in this way will do no harm to your profile but only a limited amount of tooling marks will be removed. If you start with good tooling and produce a good clean molding cut then flap wheel sanding will finish sand your product to the point of being ready to apply stain or primer.

The process of flap wheel sanding, denibbs your product. This is to remove the small fibers that pop up when sanded in any other way or when any type of chemical or water is applied to the surface of the material. These fibers if not removed will raise up and set in a dried position causing a rough primer or stain and seal coat. This will require additional sanding time being needed between coats to achieve a smooth top coat. Utilizing a flap wheel head will remove these fibers resulting in much less sanding time between coats.
You will also benefit from the fact that flap wheel heads will insure a uniform pore opening in the material. Uniform pore openings result in uniform color balance throughout the work surface.
Building your own flap wheel head as an attachment on the out feed end of the molder could be your solution. With today’s availability of inexpensive motors and controllers give it consideration.
In most cases a little fabrication work to mount a motor or two with heads on the out feed end of your molder is not difficult to do. You will want to make sure the heads can be adjusted up and down and also the ability to tilt the head can be very useful. Up and down adjustment is a must to accommodate different thicknesses of material. The ability to tilt your heads will help when running a profile that is considerably thicker along one edge than the other. Just keep in mind the need for more heads as feed rates increase. It will take approximately two heads for up to 20 feet per minute feed rates. Using four heads will get you up to approximately 60-70 feet per minute feed rates and still give good quality sanding. You will also want to make sure the heads are counter rotating. Counter rotation insures that one direction of spin will lift the fibers while the other direction of rotation successfully removes the lifted fibers.
Your end result will be a better finish that required less sanding between coats and used less chemicals to get there.

Sunday, April 18, 2010

Flap Wheel Shop Now Open

QuickWood has setup a new online webshop for its popular Abrasives flap wheels this new shop will be QuickWood abrasives and brush for the QuickWood machine but also regular flap wheels that can be used on any spindle in somebodies shop. The new flap wheel shop can be found on the following url

http://www.flap-wheels.com